
How to set up a barcode system for inventory
A barcode system turns inventory management from slow manual data entry into instant, accurate scans. This guide walks through everything you need to set one up — the four parts of a system, how to generate and print labels, choosing a scanner, which barcode type to use, and what it costs — starting from near zero with the phone already in your pocket.
Why set up a barcode system
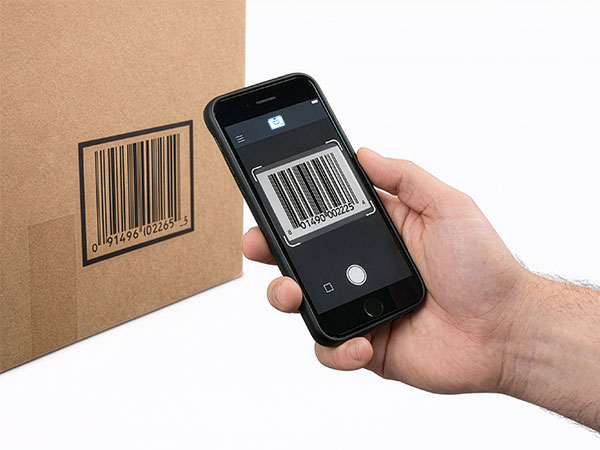
Even a simple barcode system dramatically improves accuracy and speed. A scan reads in under a second versus typing a SKU by hand, so inventory movements process in a fraction of the time. Because the barcode encodes the exact product identifier every time, it eliminates the typos and transposed digits that quietly corrupt a hand-keyed count. Anyone can learn to scan in minutes — no memorizing product codes or hunting through screens — and inventory updates the instant an item is scanned, so you always know what you have, where it is, and when it moved.
The four parts of a barcode system
A complete barcode system has four components, and you probably already own some of them. First, the barcodes themselves: the encoded symbols on your products, generated from your SKU or product codes by software. Second, labels and a printer to put those symbols on products, shelves, or bins — anything from Avery sheets through an inkjet to a dedicated thermal label printer.
Third, a scanner to read the code and send the data to your software: a smartphone camera for basic use, or a USB or Bluetooth scanner for higher volume. Fourth, and most important, the inventory software that receives the scan, looks up the product, and updates the count. The software is the brain of the system; the barcodes and scanners are just input devices. Scanning into a spreadsheet is technically possible but throws away the instant lookup and real-time update that make barcodes worth the effort.
How to set up a barcode system, step by step
Step 1 — choose your inventory software. Start with software that supports barcode generation, mobile camera scanning, and real-time sync, and that reads your chosen barcode type (Code 128 is the standard). The software is the brain, so pick it first.
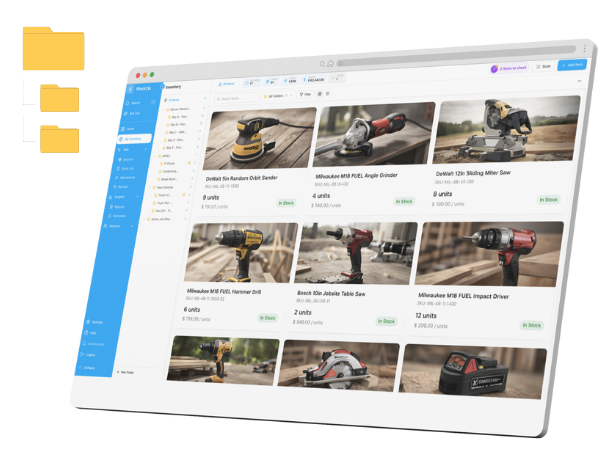
Step 2 — set up your product catalog. Enter products with unique, consistent SKUs (for example WIDGET-001 or TOOL-HAMMER-SM), or import an existing list by CSV. If products already carry retail UPC codes, use those directly. Adding a photo per item gives a visual confirmation when scanning.
Step 3 — generate and print barcode labels. Use the software to generate barcodes from your SKUs, then print in batches. Apply the 80/20 rule: label your highest-volume items first so the benefit starts immediately. Choose a label size that fits the product, match durability to the environment (paper indoors, synthetic for cold or outdoor storage), and print a few test labels before a full run.
Step 4 — choose your scanning hardware. Match the scanner to volume and environment. A smartphone app is free and fine for under ~50 scans a day or mobile use; a USB wired scanner ($30–100) suits a desk or checkout; a Bluetooth wireless scanner ($80–200) fits a warehouse that needs mobility plus speed; a rugged handheld ($300+) is for harsh environments. Start with the phone and add hardware only when volume demands it.
Step 5 — test and train the team. Before full rollout, scan a handful of items to confirm distance, angle, and that the software updates correctly. Write simple workflow guides — scan to add, scan to remove — and assign scanning responsibilities to specific roles.
Step 6 — roll out gradually. Do not try to label everything at once. Start with the top 20 movers in week one, expand to the full category over the next couple of weeks, add the remaining products as they are handled, and label new arrivals as they come in. A location-by-location rollout lets you fix label and data issues cheaply as you find them.
Choosing the right barcode type
Most small businesses should use Code 128 for internal inventory. It encodes letters, numbers, and symbols, is compact and high-density, and is supported by virtually every scanner — ideal for SKUs like TOOL-HAMMER-SM. Code 39 is a simpler, slightly larger alternative: very reliable and easy to read, a reasonable choice where label space is not tight.
UPC and EAN are retail product codes — UPC is 12 digits (North America), EAN is 13 (international) — and you need them only for products sold through retail stores, where they require a registered GS1 prefix for genuinely unique codes. QR codes are the 2D option: they hold URLs and richer data and scan with any smartphone, which suits assets, location labels, and anything you want people to open on a phone. For a straightforward internal ID lookup, though, a 1D Code 128 is all you need.
What a barcode system costs
A basic barcode system can start under $100: a free scanning app on a phone you already own, plus a batch of printed labels. A fuller setup with a dedicated scanner ($50–200) and a label printer ($100–300) runs roughly $150–500 one-time. Cloud inventory software adds anywhere from $0 to about $50 a month depending on the plan and features. The single biggest cost saver is starting with phone-camera scanning and software-generated Code 128 labels, then adding a Bluetooth scanner or thermal printer only once volume justifies the spend.
Setting up a barcode system in StockZip
StockZip covers the software side of the four parts. It generates a code from every item’s SKU, scans with a phone camera or a paired Bluetooth scanner, and updates the count in real time. Generating a code for lookup and scanning it to find or adjust an item are both available on the Free plan, so you can stand up the scan-and-update loop without paying.
Two pieces sit on paid plans, and it is worth planning around them. Printing barcode or QR label sheets in batches — the physical labels for step 3 — is a Starter-plan feature, not Free; on Free you generate and scan codes, but batch label printing is where a paid plan comes in. The check-in / check-out workflow (assigning tools and assets to people by scan) is likewise a Starter feature. So the honest path is: run scanning and code generation free to prove the workflow, then move to Starter when you need printed label sheets and check-in/out across the team.